Bottling peaches using a water bath canning or steam canning method is a straightforward way to capture the juicy sweetness of ripe peaches. But the process can be a little intimidating if you’ve never done it before. Don’t worry! This quick guide will walk you through all the steps from assembling your tool kit and preparing your peaches to sealing and preserving them safely and deliciously. We can’t wait to get started with you!
For our bottling session, we had Bonnie in the kitchen with us. There’s nothing like having sisters in the kitchen. It’s the best! She knows a lot of Grandma Foote’s secrets and has become the family’s preserving guru. So we were very glad to have her guiding us through each part of the process. Keeping up traditions can be tough, especially when our loved ones pass away, but Bonnie was up to the task and we love her for it. Ready or not, here we go.
Tools & Equipment Needed
We know the initial investment in preserving products is steep. You have to get the jars, the canner, the lids and rings. But trust us, these are the types of kitchen tools you can use over and over, year after year. So once you have the original setup, the only things you will need to replace are the canning lids. If you ask us, it is definitely worth it—especially if you intend to keep growing and harvesting from your own garden.
Before diving into the canning process, gather the following tools:
- Canning Jars – Use Mason or Ball jars in pint or quart sizes.
- Lids and Bands – Lids should be new for each canning session, but bands can be reused.
- Water Bath Canner – A large pot with a rack to keep jars off the bottom.
- Jar Lifter – For safely removing jars from boiling water.
- Canning Funnel – A must! Helps to fill jars without spills.
- Large Ladle – For transferring fruit and syrup into jars.
- Bubble Remover/Headspace Tool – To remove air bubbles and ensure proper headspace.
- Clean Cloths – For wiping jar rims.
- Large Pot – For blanching peaches and preparing the syrup.
- Small Paring Knife – For peeling and slicing peaches.
Ingredients
- Fresh Peaches – About 10-12 medium-sized peaches will fill 4 pint jars or 2 quart jars.
- Syrup – You can use light, medium, or heavy syrup based on your preference:
- Light Syrup: 1 cup sugar to 4 cups water
- Medium Syrup: 1.5 cups sugar to 4 cups water
- Heavy Syrup: 2.5 cups sugar to 4 cups water
- Bottled Lemon Juice – 1 tablespoon per pint jar or 2 tablespoons per quart jar (to maintain acidity and help with preservation).

Step-by-Step Guide for Bottling Peaches
Now that you have everything ready, let’s get started bottling those delicious peaches.
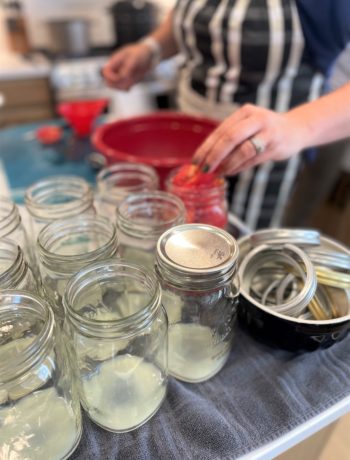
- Prepare the Jars and Lids
- Wash your jars and lids in hot, soapy water. Rinse them thoroughly.
- Sterilize the jars by placing them in a boiling water bath for 10 minutes or running them through a hot cycle in the dishwasher. Try to keep the jars and lids pretty hot right up until ready to use. This helps prevent cracking when you fill the jars with hot contents or transfer them to the canner.
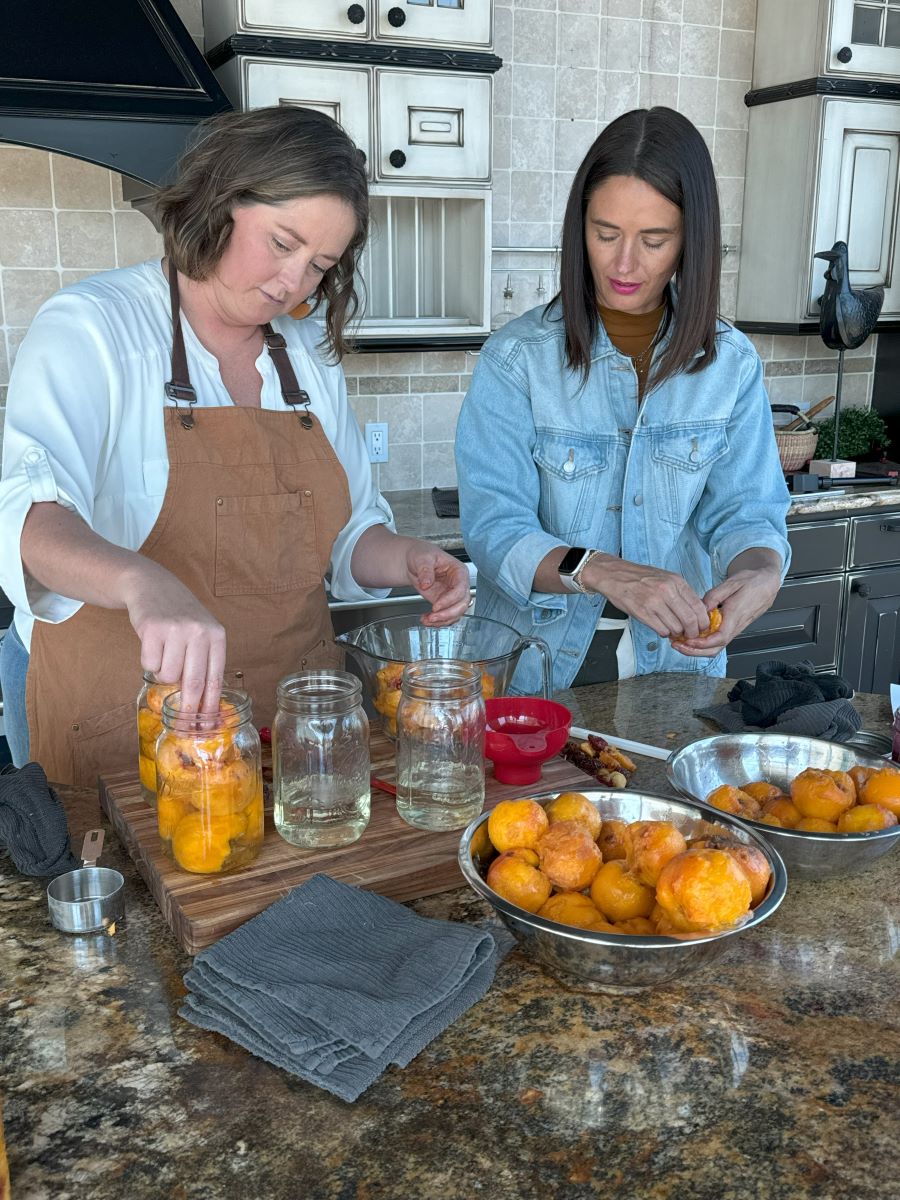
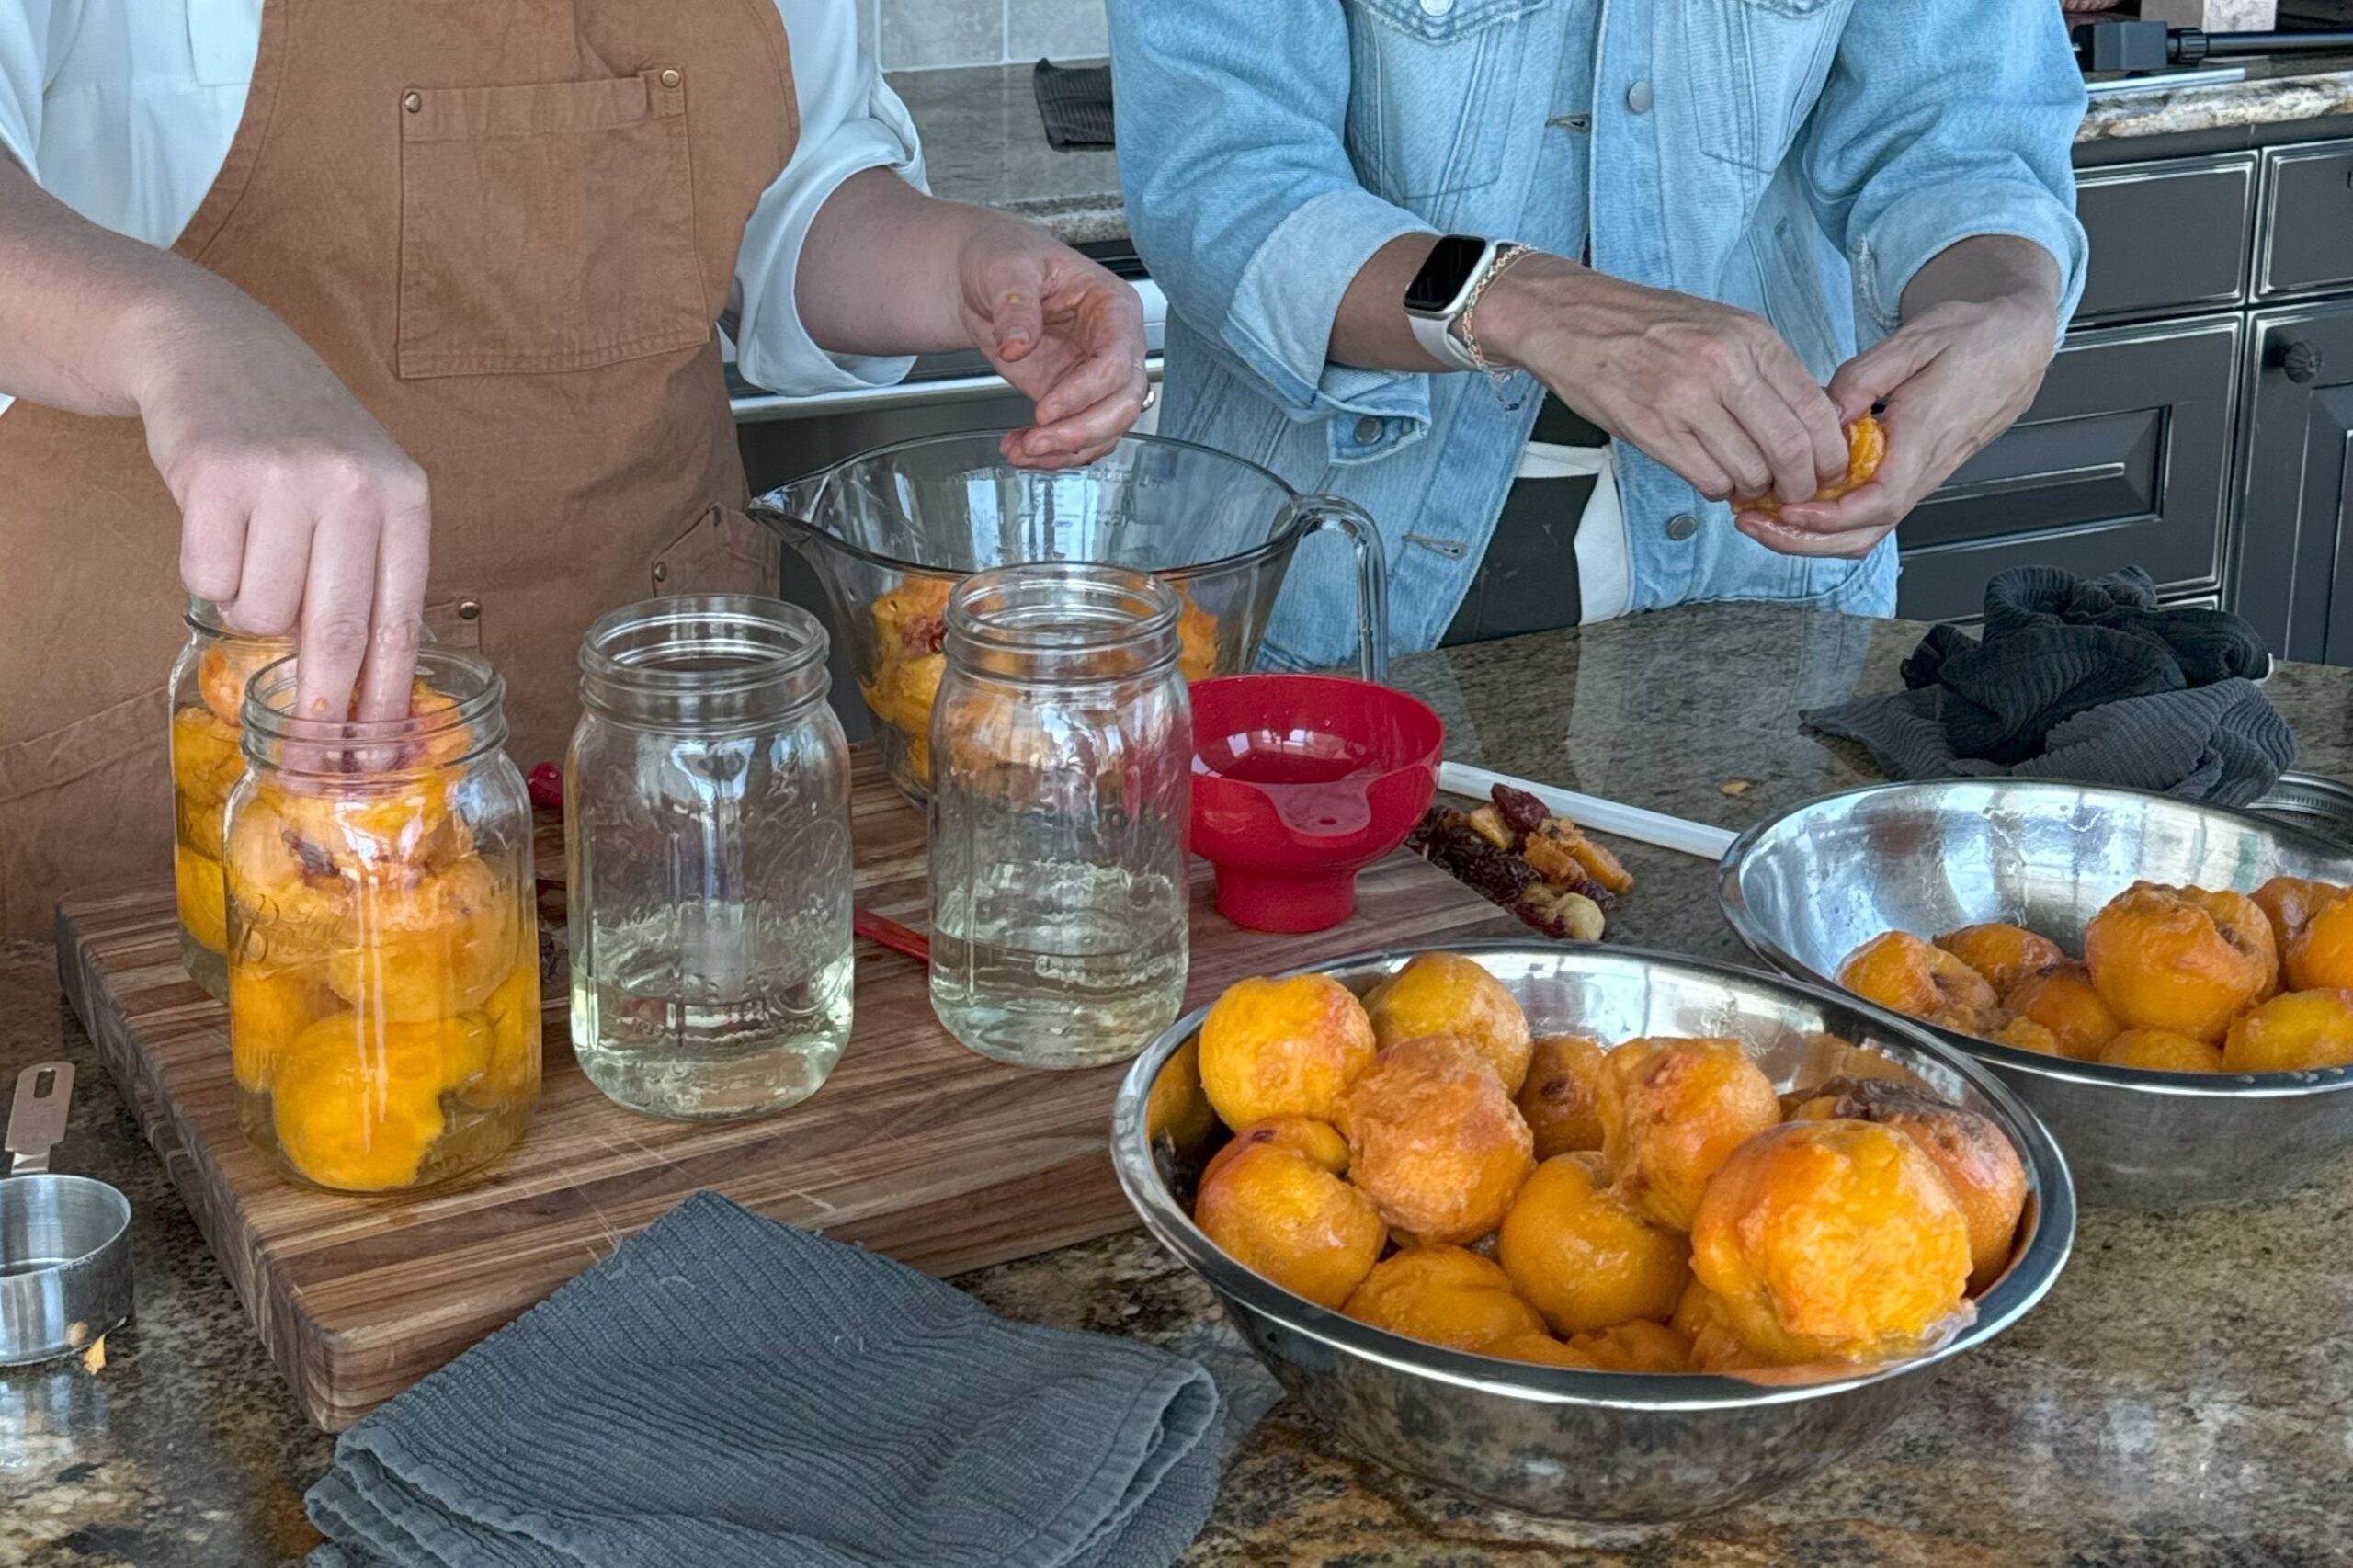
- Prepare the Peaches
- Bring a large pot of water to a boil. Fill a separate large bowl with ice water.
- Score the bottom of each peach with a small “X” using your paring knife.
- Carefully drop the peaches into the boiling water for about 30-60 seconds until the skins start to loosen. (Don’t drop in too many. Maybe just 4-5 peaches at a time and work quickly).
- Next, transfer the peaches to the ice water to cool quickly. Once cool enough to handle, peel the skins, slice the peaches into halves or quarters, and remove the pits.
*Note: You can use a peach peeler or a paring knife to remove the skins instead of blanching the peaches. It might take you just as long, but will spare you from washing the extra pan.
- Prepare the Syrup
- In a large pot, combine the water and sugar according to your desired syrup type (light, medium, or heavy).
- Afterwards, stir until the sugar is completely dissolved. Heat the syrup just until it’s hot but not boiling.
*Note: You can also preserve your peaches in just plain water, apple juice, or white grape juice, but they will not be as sweet. You will also have to use the hot-pack/pressure canning method with those peaches to reduce the chances of them spoiling quickly.
- Pack the Jars
- Pack the peach halves or slices into the hot sterilized jars, leaving about 1/2 inch of headspace at the top. Using the canning funnel really helps keep the rims of your jars clean. To prevent peach slices from floating you will want to pack them relatively tight into the jars.
- Pour the hot syrup over the peaches, maintaining the 1/2 inch headspace. Use the bubble remover tool to gently stir around the edges of the jar to release any trapped air bubbles. Be sure to cover the peaches completely.
- Remove the funnel and wipe the rims of the jars with a clean, damp cloth to ensure a proper seal.
- Apply Lids and Bands
- Place a warm lid on each jar, making sure it’s centered and not touching the peaches.
- Screw on the metal bands until they are only fingertip-tight. We know it’s tempting, but do not overtighten. It can interfere with the sealing process.
- Process the Jars
- Fill the water bath or steam canner with water.
- Carefully place the jars in the canner using the jar lifter. Make sure the jars are covered by at least 1-2 inches of water.
- Bring the water to a rolling boil and process the jars for 20 minutes. Make sure to adjust processing time based on elevation if necessary. (At elevations above 1,000 feet, increase processing time by 5 minutes for every additional 1,000 feet.)
- Cool and Store
- After processing, turn off the heat and carefully remove the jars using the jar lifter. Place them on a clean towel or cooling rack, making sure they are not touching each other.
- Let the jars cool completely, which can take up to 12 hours. Do not disturb the jars during this time to allow the seal to form properly. As the jars seal they will start to pop.
- Check the seals by pressing in the center of each lid. If it doesn’t pop back, the jar is sealed properly. And don’t worry! Any jars that haven’t sealed can be refrigerated and are completely safe to use within a few weeks.
- Label and Store
- Once cooled and sealed, label your jars with the date and type of fruit. And for best results, store them in a cool, dark, and dry place.
- Canned peaches are best used within a year, though they can last longer if stored properly.
You are now ready to tackle the job of preserving your summer harvest! We know you can do it. It’s a process that has been around for more than a hundred years, and we have come a long way. With the right tools, ingredients, recipes, and careful attention to detail, you’ll have jars of delicious peaches ready for pies, cobblers, or simply a sweet treat straight from the jar for months to come. Happy canning!